 Save to Pinterest
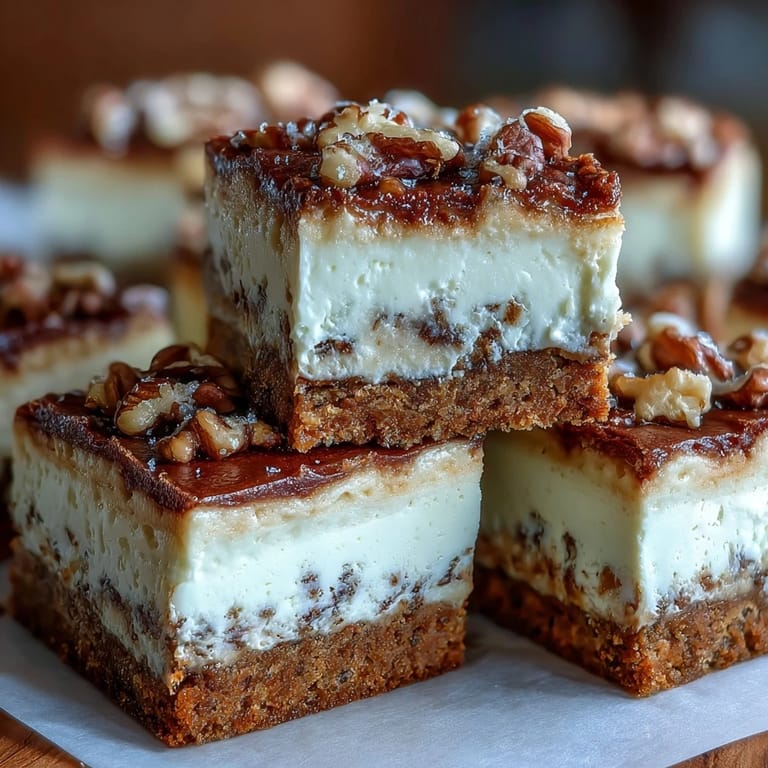
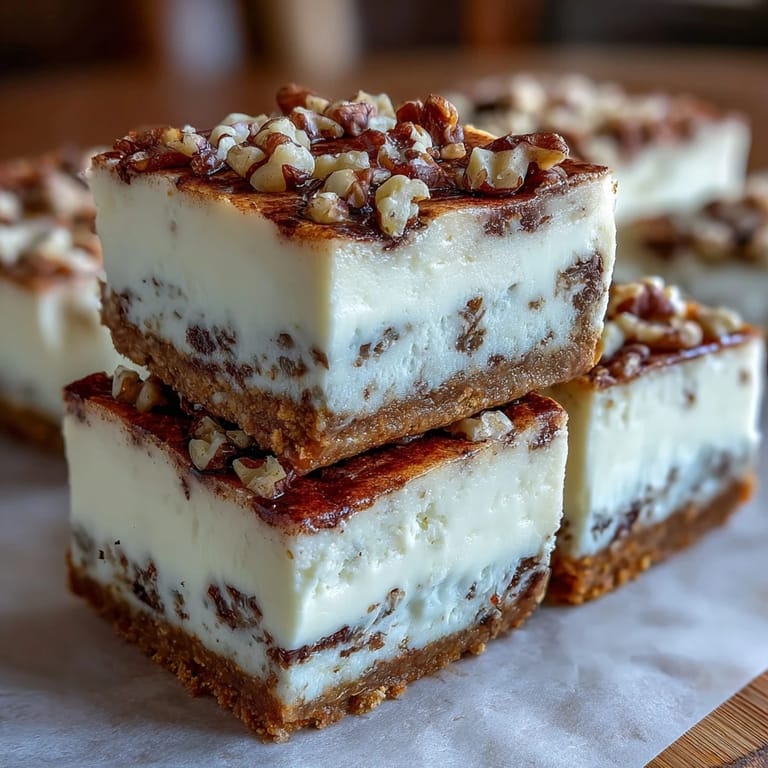
 The first time I made carrot cake cheesecake bars, my kitchen was filled with the scent of warming spices and tangy cream cheese—and I nearly burned my thumb impatiently checking for doneness. There was something playful about layering two classics, and swirling them together felt a little like mixing up springtime in a pan. I couldn't help but smile as the cinnamon and nutmeg drifted through the air, turning ordinary afternoon prep into a small celebration. Watching the batter settle and the cheesecake shine on top made me anticipate sharing these bars before they'd even cooled. Sometimes, it's the moments spent in anticipation, rather than the act of baking itself, that make a recipe stand out.
One rainy afternoon last April, I baked a batch of these bars for a small family get-together. I remember my cousin asking if the swirls were difficult to achieve, while my uncle claimed they'd never tasted a better version of carrot cake. We ended up debating whether walnuts or pecans were the superior nut, but the bars disappeared before a verdict was reached. The kitchen echoed with laughter and the clink of forks—proof that this recipe builds connections as well as flavor. Sometimes, it's not just the recipe but the people surrounding the pan that bring it to life.
Ingredients
- All-purpose flour: This forms the structure of both layers—make sure to measure accurately for a light, tender bite.
- Baking powder & baking soda: They give the carrot cake layer its lift; don’t skip the double-action chemical magic.
- Salt: Balances out sweetness and rounds out flavors—just a pinch makes a difference.
- Ground cinnamon & nutmeg: These add warmth and depth; fresh grated nutmeg elevates the aroma.
- Vegetable oil: Keeps the carrot cake moist and subtly rich; I learned that oil works better than butter for this recipe.
- Granulated sugar & brown sugar: A mix ensures moist texture and complements the spices; use packed brown sugar for extra caramel notes.
- Large eggs: Bind both layers together and help set the cheesecake; room temperature eggs prevent curdling.
- Vanilla extract: Smooths out the flavors in both cake and cheesecake layers—don’t be shy with the spoon.
- Finely grated carrots: The heart of the carrot cake—grate yourself for best texture and vivid color.
- Chopped walnuts or pecans (optional): Add crunch and flavor—sprinkle on top for a rustic finish.
- Cream cheese: Softened cream cheese blends to silkiness for the cheesecake layer; room temp is key to avoid lumps.
- Optional toppings—nuts and cinnamon: A finishing touch for more texture and spice, especially if you like a little drama at dessert.
Tired of Takeout? 🥡
Get 10 meals you can make faster than delivery arrives. Seriously.
One email. No spam. Unsubscribe anytime.
Instructions
- Line & Prepare the Pan:
- Start by lining your pan with parchment, leaving an overhang. It feels a little like wrapping a gift—the bars will lift out so easily later.
- Mix the Carrot Cake Layer:
- Whisk the dry ingredients in one bowl, then stir the oil, sugars, eggs, and vanilla in another. Add carrots and nuts, then gently fold in dry ingredients until just combined—the color will turn beautifully golden-orange.
- Make the Cheesecake Layer:
- Beat cream cheese and sugar until creamy and smooth, then mix in eggs one at a time, followed by vanilla and flour. The batter becomes pale and silky, and you’ll know it’s ready by its glossy sheen.
- Layer & Swirl:
- Spread half the carrot cake batter, then all the cheesecake, and dollop the rest of the carrot cake batter on top. Swirl with a knife for a marbled look—the swirls should feel satisfying, but don’t overdo it.
- Add Toppings:
- If using, sprinkle nuts and cinnamon for more texture and aroma. This step always makes me feel like a pastry chef, even if it’s just for family.
- Bake & Chill:
- Bake until the edges are golden and the center is mostly set. Let it cool fully—then refrigerate for a few hours so the layers slice clean and the cheesecake sets perfectly.
 Save to Pinterest
 The moment these bars became more than just a recipe for me was when a friend stopped by unexpectedly and I handed her a slice, straight from the fridge. She took one bite and paused, eyes widening in surprise, declaring it "the best surprise snack" she'd had all year. Something about sharing a homemade treat in a spontaneous way made the flavors feel even brighter, and the day lighter. I’ve noticed that these bars always have that effect—lifting spirits, even on an ordinary afternoon.
Swapping Ingredients to Suit Your Pantry
I've learned that you can swap in gluten-free flour or shredded coconut for a fun twist—especially when baking for friends with dietary needs. Adding a handful of raisins gives a soft chew and extra sweetness if you’re craving a little more complexity. Just double check your substitutions so the texture stays tender rather than dense.
How to Achieve the Perfect Swirl
Getting the cheesecake and carrot layers to marble just right is oddly satisfying—move your knife gently but confidently through the batter. If you’re nervous, try practicing with only half the pan so you can play with the pattern. Remember, imperfect swirls make each batch feel unique, and that’s half the fun.
Serving & Storing for Lasting Freshness
Once cooled and chilled, slicing these bars is a breeze with a sharp knife wiped clean between cuts. Keep leftovers in an airtight container for up to four days—the flavors meld and the bars stay moist. For a pretty presentation, dust with extra cinnamon right before serving.
- If you're making these ahead, line the container with parchment to prevent sticking.
- Let bars rest at room temperature for 10 minutes for best texture.
- Don't forget, these bars taste even better after a day in the fridge.
 Save to Pinterest
 Making carrot cake cheesecake bars turns any day into something special, and sharing them always invites a little bit of happy chatter around the table. Here's hoping your next batch brings both deliciousness and a dash of fun to your kitchen.
Recipe FAQs
- → Can I make these bars gluten-free?
Yes, substitute a 1:1 gluten-free flour blend for the all-purpose flour in the carrot cake layer.
- → What add-ins work well in the carrot cake layer?
Raisins or shredded coconut enhance texture and flavor. You can also use chopped walnuts or pecans for crunch.
- → How long should the bars chill before slicing?
Let the bars cool in the pan, then refrigerate for at least 3 hours to ensure clean slices and firm layers.
- → Can these bars be made ahead of time?
Absolutely. Prepare and bake in advance, store in the refrigerator, and slice when ready to serve.
- → What is the best way to achieve a marbled effect?
Dollop remaining carrot batter over the cheesecake, then gently swirl with a knife for a decorative finish.
- → What tools help with preparation?
A stand mixer or hand mixer, mixing bowls, whisk, rubber spatula, and parchment paper are essential for easy prep.