 Save to Pinterest
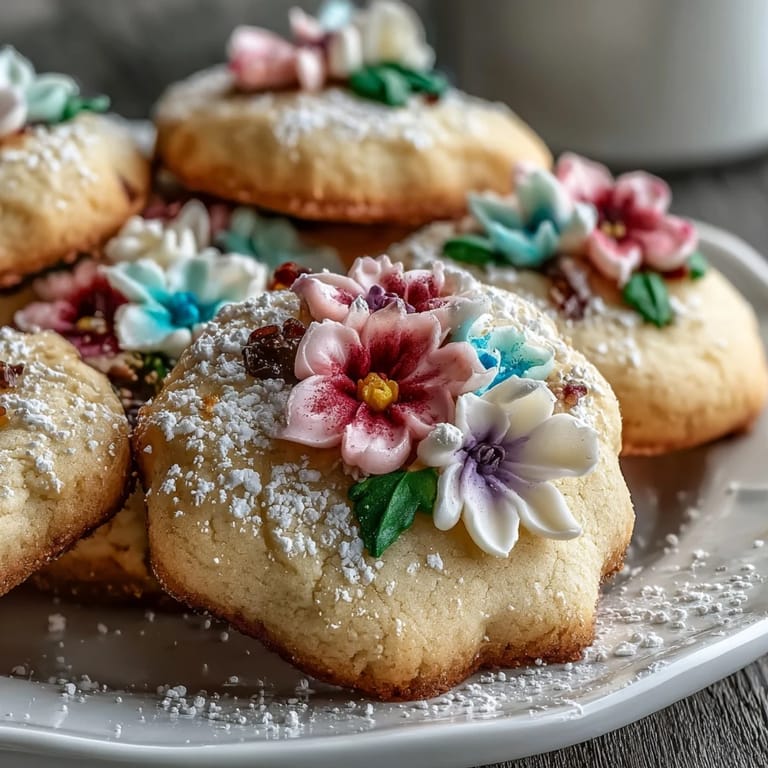
 My cousin called me in a panic three days before her baby shower, asking if I could whip up something special for the dessert table. I'd never made decorated cookies before, but something about the way she described wanting delicate flowers in soft pastels made me want to try. Standing in my kitchen that evening, I realized these weren't just cookies—they were tiny edible gifts that would sit on a table celebrating new life. That first batch came out golden and perfect, and watching guests bite into them with genuine delight made me understand why people become obsessed with decorating things.
I still remember my neighbor peeking over the fence while I was piping the last batch, asking if I was selling them. When I offered her a few, she came back the next day wanting to know my secret—turns out the simple, buttery taste was what got her, not just the pretty colors. That conversation led to us baking together for her daughter's baby shower two months later, and she's been making these ever since.
Ingredients
- All-purpose flour (2 1/2 cups): The foundation that keeps these cookies tender but structured enough to decorate; sifting isn't required here, but it does help blend everything smoothly.
- Baking powder (1/2 teaspoon): Just enough lift to give the cookies a slight dome, which makes them easier to ice without sliding off.
- Salt (1/4 teaspoon): A tiny pinch that makes the butter and vanilla sing without tasting salty.
- Unsalted butter (3/4 cup, softened): Room temperature butter creams better and creates that delicate crumb; cold butter fights back.
- Granulated sugar (3/4 cup): The sweetness should be gentle, not overwhelming, so these work as tea cookies too.
- Large egg (1): Brings the dough together and helps the cookies hold their shape during baking.
- Pure vanilla extract (2 teaspoons): Use real vanilla if you can; it adds a subtle warmth that extract alone can't quite achieve.
- Powdered sugar (3 cups, sifted): The base of your icing, and sifting it prevents lumpy royal icing that won't spread smoothly.
- Meringue powder (2 tablespoons): The secret to royal icing that hardens beautifully; it's usually in the baking aisle near cake decorating supplies.
- Water (4-5 tablespoons): Start with less and add gradually—the consistency should be thick enough to hold a piped line but thin enough to spread.
- Food coloring gels (pastel shades): Gel colors are more concentrated than liquid, so a tiny touch goes a long way and won't make your icing watery.
Tired of Takeout? 🥡
Get 10 meals you can make faster than delivery arrives. Seriously.
One email. No spam. Unsubscribe anytime.
Instructions
- Combine the dry ingredients:
- Whisk flour, baking powder, and salt together in a medium bowl, making sure everything is evenly distributed. This step prevents pockets of unmixed flour later.
- Cream the butter and sugar:
- Beat softened butter and sugar for 2 to 3 minutes until it looks pale and fluffy—this is where air gets incorporated and your cookies will be tender. You'll hear the mixer working and feel the shift from dense to light.
- Add the egg and vanilla:
- Mix the egg and vanilla into the creamed mixture until fully combined and the batter looks smooth and slightly glossy. If it looks separated, you're not beating it long enough.
- Bring the dough together:
- Add the dry ingredients gradually to the wet mixture, stirring just until no streaks of flour remain. Overmixing develops gluten and makes cookies tough, so stop as soon as everything is incorporated.
- Chill the dough:
- Divide the dough in half, flatten each into a disc about 1 inch thick, wrap tightly in plastic wrap, and refrigerate for at least 1 hour. Cold dough is easier to roll and less likely to spread wildly in the oven.
- Prepare for baking:
- Preheat your oven to 350°F (175°C) and line two baking sheets with parchment paper. This temperature keeps the cookies from browning too fast on the edges while the centers stay soft.
- Roll and cut the cookies:
- On a lightly floured surface, roll one disc to 1/4-inch thickness and cut flower shapes with your favorite cookie cutter. The thickness should be consistent so they bake evenly.
- Arrange on the sheets:
- Place cookies about 1 inch apart, allowing room for slight spreading. Re-roll scraps gently until you can't cut anymore—overworking the dough will make the last batch slightly tougher.
- Bake until golden:
- Bake for 10 to 12 minutes, watching for light golden edges—the centers might still look slightly soft. They'll continue cooking on the hot pan, so don't overbake or they'll dry out.
- Cool properly:
- Leave cookies on the baking sheet for 5 minutes so they set, then transfer to a wire rack to cool completely. This prevents them from breaking when you frost them.
- Make the royal icing:
- Sift powdered sugar and meringue powder together, then add water 1 tablespoon at a time, stirring until you reach a thick but spreadable consistency. It should flow slightly but hold its shape when piped.
- Color the icing:
- Divide icing into small bowls and add tiny dots of gel color to each, stirring gently until you reach soft pastel shades. Less color makes prettier pastels than you'd expect.
- Decorate with intention:
- Spread or pipe icing onto completely cooled cookies, letting your hand move naturally rather than perfectly. The beauty is in the slight imperfections and how the colors complement the flower shapes.
- Let it set:
- Allow icing to dry completely, at least 2 to 3 hours at room temperature, before stacking or packaging. This prevents smudging and keeps everything pristine.
 Save to Pinterest
 There's something about handing someone a box of these cookies that shifts the energy—it's not just sugar and butter anymore, it's thoughtfulness wrapped in tissue paper. I've learned that the act of making these delicate flowers matters almost as much as eating them.
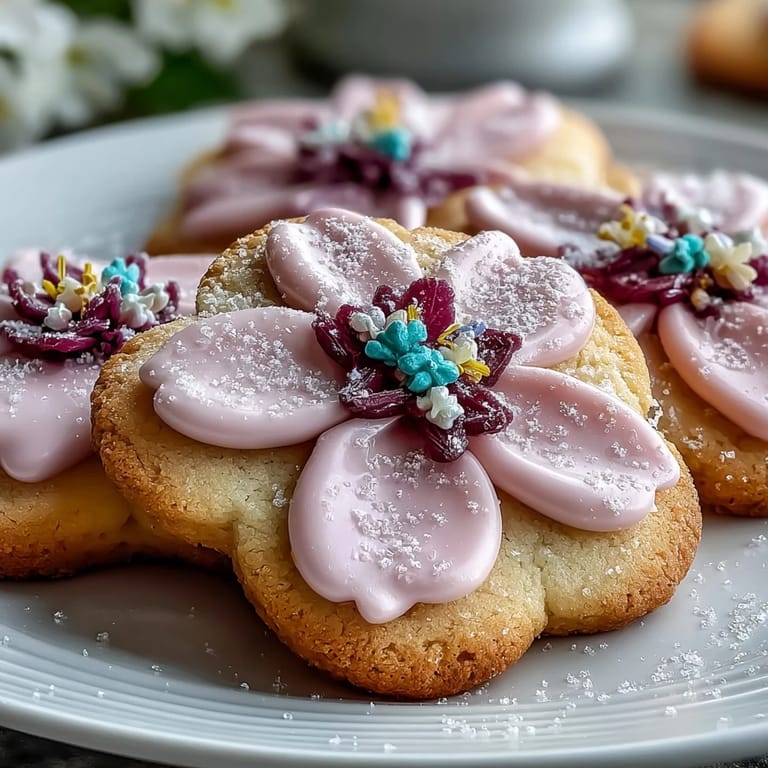
The Magic of Pastel Colors
The first time I made these, I used regular food coloring instead of gel, and the icing turned into a watery mess that wouldn't hold a piped line. Now I keep a small set of gel colors in my pantry because the difference is night and day—gel colors are concentrated, so you use less water and your icing stays thick and workable. I've learned to test the color on a small piece of cookie first, because pastels are all about restraint; a tiny dot of color goes further than you think and the results feel elegant rather than childish.
Why This Recipe Works for Gatherings
These cookies strike a balance between impressive and approachable that I haven't found in many other recipes. They're sturdy enough to travel in a box without falling apart, pretty enough to sit on a fancy dessert table, and simple enough that you can make dozens without losing your mind. The flavor is deliberately understated so they pair with tea, coffee, or even sparkling lemonade at a celebration.
Storage and Make-Ahead Magic
The undecorated baked cookies keep in an airtight container for up to five days, which means you can bake the night before and frost the morning of your event—a game-changer when you're juggling multiple tasks. The fully decorated cookies are best eaten within two or three days while the icing stays crisp, but they'll soften slightly if stored for longer. If you're making these ahead for a baby shower or wedding, freeze the undecorated cookies up to two weeks and frost them fresh the day before—it's the smartest shortcut I've found.
- Keep your pastel gel colors in a cool, dark cabinet so they don't separate or change shade.
- If icing cracks while drying, it means the humidity is too low—mist your cookies lightly with water and cover them loosely with a towel.
- Always let cookies cool completely before decorating or the icing will slide right off and melt into the warm cookie surface.
 Save to Pinterest
 These cookies remind me that celebration doesn't require perfection, just intention and a little butter. Every time someone tells me they're baking these for their own event, I feel that same joy from watching my cousin's guests smile.
Recipe FAQs
- → What gives the cookies their delicate texture?
The combination of softened butter and careful mixing creates a tender, buttery dough that bakes into a delicate texture.
- → How is the pastel color achieved on the icing?
Pastel shades are created by adding small amounts of food coloring gels to the royal icing, resulting in soft, vibrant hues.
- → Can I substitute ingredients for dietary preferences?
Yes, plant-based butter can replace dairy butter for a dairy-free version, and almond extract can add subtle flavor without changing texture.
- → What is the best way to achieve detailed flower decorations?
Using piping bags with small round tips allows for precise application of icing to enhance the flower shapes.
- → How long should the icing set before serving?
Allow the royal icing to set completely, typically a couple of hours, so it firms up nicely on the cookies.