 Save to Pinterest
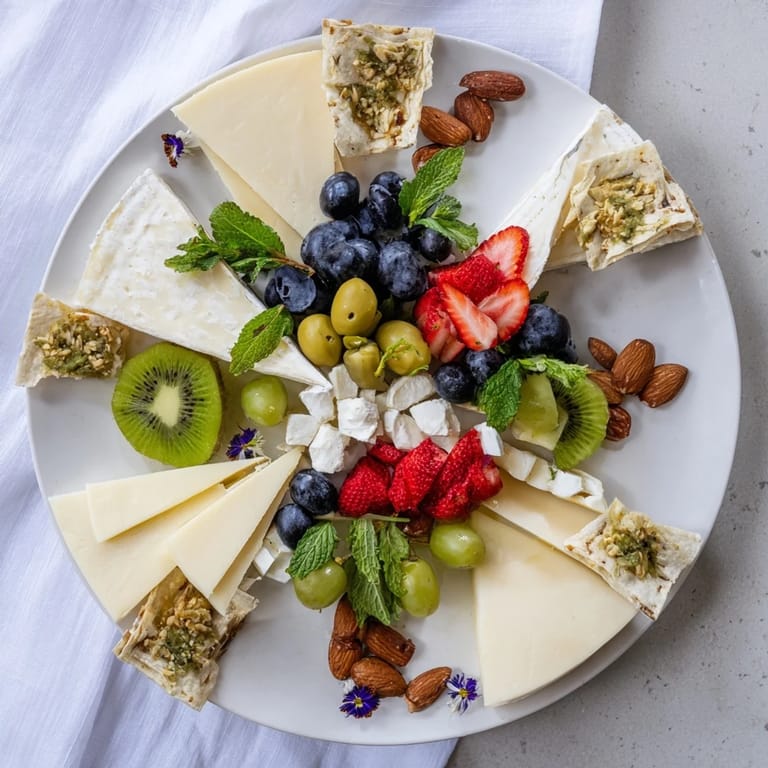
 I'll never forget the moment I realized that food could be art in the most unexpected way. I was setting up for my sister's engagement party, and I had this vision of creating something that would make guests pause before they even took a bite. That's when the idea struck me—what if the empty space on the platter told a story just as much as the food itself? I sketched her initials on parchment, arranged everything with meticulous care, and when I lifted that paper away to reveal the negative space, even I gasped. The room fell silent for a moment before everyone rushed forward to admire it. That platter became the most talked-about part of the party, and honestly, it tasted even better knowing we'd created something that beautiful together.
I remember my best friend Jenny asking me how I created such perfect shapes on that platter. She was convinced there was some fancy tool involved. When I told her it was just careful arrangement and a pencil sketch, she laughed and said, 'That's the most you I've ever heard.' It's true—it rewards patience and attention to detail, but it doesn't require fancy equipment or advanced skills. Just thoughtfulness and a steady hand.
Ingredients
- Brie cheese, sliced (100 g): This is your creamy anchor, the ingredient that feels luxurious on the palate. I learned that slicing it while it's still slightly cool makes it easier to work with, and it stays beautiful on the platter longer.
- Manchego cheese, sliced (100 g): The firm texture and pale gold color add visual contrast, plus it brings that slightly sweet, nutty character that makes people ask 'what is that?' The satisfying snap when you bite into it never gets old.
- Goat cheese, crumbled (100 g): This one's your wild card—its creamy tanginess and bright white color create gorgeous texture variation. I always crumble it by hand rather than using a fork; it looks more intentional.
- Seedless red grapes (1 cup): Their jewel-like roundness fills gaps with elegance, and they catch light in a way that makes the whole platter glow. I learned the hard way that they roll if your platter isn't perfectly level.
- Strawberries, halved (1 cup): The fresh red brightens everything, and cutting them just before assembly keeps them from weeping and staining the surrounding items.
- Kiwi, sliced (1): Those green wheels with their tiny dark seeds add graphic appeal and a pop of color contrast that photographs beautifully.
- Blueberries (1/2 cup): They're your detail workers—perfect for filling small gaps and creating delicate color transitions between larger elements.
- Thin crackers (12): Choose ones that are sturdy enough to hold cheese but delicate enough not to overwhelm the platter's visual balance.
- Roasted almonds (1/2 cup): Toast adds richness, and their natural irregular shape creates wonderful texture interest.
- Green olives, pitted (1/4 cup): These bring a salty, briny note and their dark color provides dramatic contrast against lighter ingredients.
- Fresh mint leaves: Save these for the final reveal when you pull away the parchment—they catch light and add that last whisper of freshness.
- Edible flowers (optional): If you use them, press them gently between your fingers to release their essence, and place them where they'll add that element of surprise.
Tired of Takeout? 🥡
Get 10 meals you can make faster than delivery arrives. Seriously.
One email. No spam. Unsubscribe anytime.
Instructions
- Choose Your Design and Create a Guide:
- This is where the magic starts. Think about what shape tells your story—initials for someone special, a star for celebration, a heart for love. Sketch it lightly on parchment paper, making sure it fits comfortably on your serving platter with room around it. Don't overthink this part; the design should feel like something you're discovering rather than planning.
- Set Up Your Foundation:
- Place the parchment on your platter as your invisible guide. Have all your ingredients prepped and in small bowls nearby—this is crucial because once you start arranging, you won't want to pause. You're about to become an artist, and artists don't stop mid-stroke.
- Begin with Your Cheese Clusters:
- Start placing your cheeses in thoughtful clusters around the outlined negative space. Overlap the slices slightly; it looks more inviting and intentional. This is when you'll really understand how important it is to leave that center space completely clear. It's tempting to fill it, but resist—the empty space is your statement.
- Build with Crackers and Structure:
- Position your crackers standing up at angles, leaning against cheese or creating little architectural moments. They provide height variation and prevent everything from looking flat. Think of them as the buildings in your edible landscape.
- Paint with Fruits:
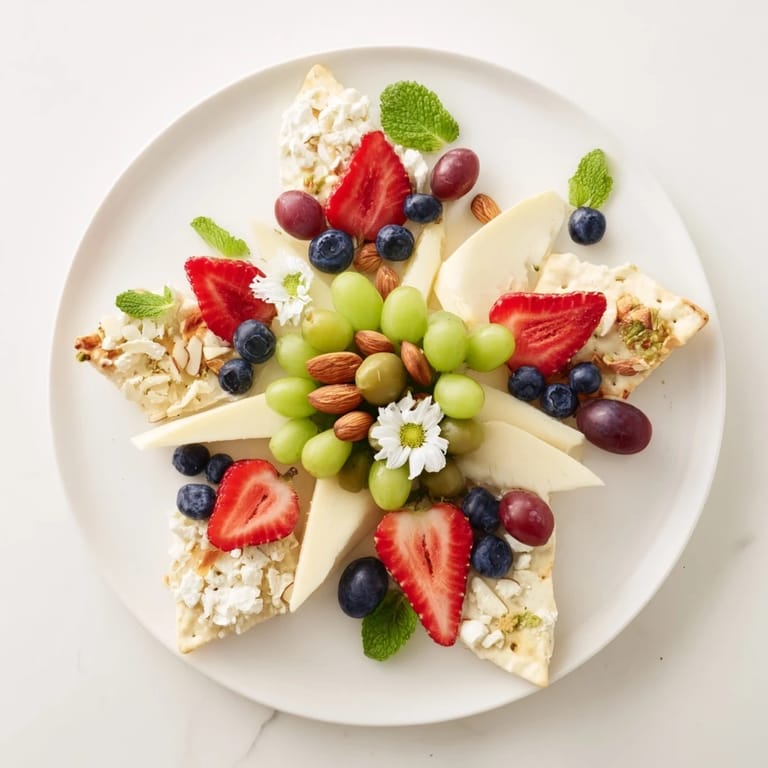
- Now you're adding color and vibrancy. Arrange fruit slices and berries with intention, using them to define edges and create gentle gradients of color. This is where you develop an eye for balance—darker fruits on one side, lighter on the other, creating a visual rhythm. The grapes should nestle between larger items, and strawberries should face up to show their beautiful inner structure.
- Layer with Texture:
- Scatter almonds and olives in small piles throughout. These aren't just flavor additions—they're texture soldiers, breaking up the smoothness of cheeses and creating visual interest. A handful scattered near one corner, another cluster near another area, building harmony without perfect symmetry.
- Reveal Your Masterpiece:
- Take a breath. This is the moment. Carefully lift the parchment away, letting your pencil lines disappear and revealing the negative space you've been protecting. Take a step back and look at what your hands created. It's a moment worth savoring.
- Add the Final Flourish:
- Scatter mint leaves across the platter where they'll catch light and add that final whisper of freshness. If you're using edible flowers, place them like you're signing your name to a piece of art. They should feel discovered, not planted.
- Present with Pride:
- Serve this platter as the centerpiece it is. Invite guests to admire it before they eat. Let them take pictures. This is food as performance, and you're the artist.
 Save to Pinterest
 What stays with me most about creating these platters is watching someone's face transform when they realize the empty space is intentional. It's not a gap or a mistake—it's the whole point. Food becomes conversation, becomes memory, becomes something they'll recreate and tell their friends about. That's when I knew this wasn't just a recipe; it was a way to make moments matter.
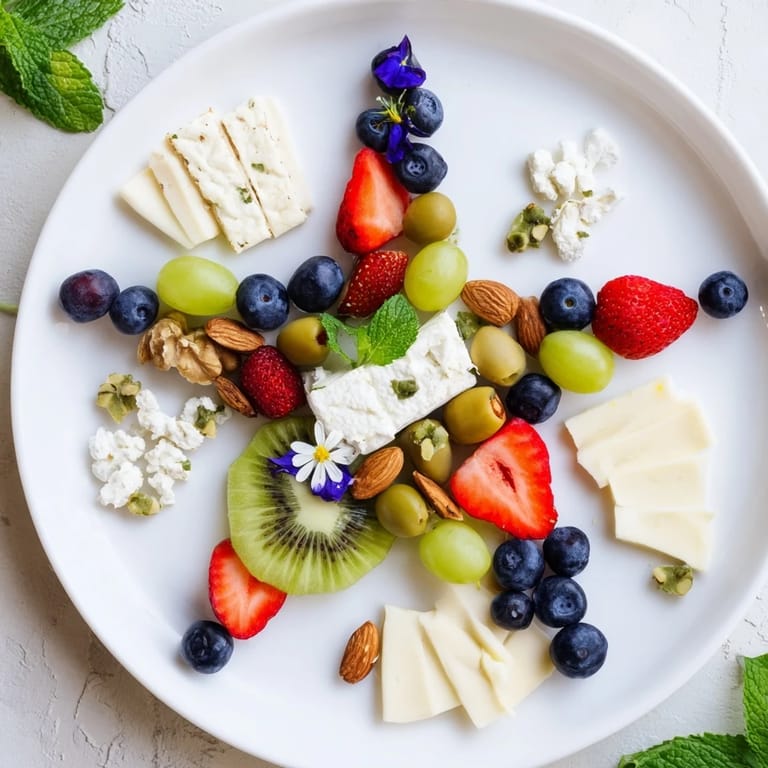
The Art of Negative Space
There's something profound about deliberately leaving space empty. In our world of abundance and overflowing plates, this approach asks us to consider what we're not showing as much as what we are. The negative space isn't absence—it's presence through restraint. I've learned that the most impactful designs are often the simplest ones. A single letter can be more striking than an elaborate pattern. A clean star silhouette can outshine a busy mandala. The empty space breathes and draws the eye right where you want it.
Customizing for Your Story
The beauty of this approach is that it's infinitely personal. I've made these platters for birthdays with age numbers, for anniversaries with hearts, for baby showers with baby footprints. Each one becomes a gift wrapped in edible form. I once created a platter for my boss with his company's logo in negative space—he still talks about it years later. The design transforms the platter from something you serve to something you're saying something with.
Sweet or Savory, Always Stunning
This concept works beautifully in both directions. For dessert versions, I've replaced the cheeses with dark and white chocolates, used candied fruits and biscotti, created shapes in negative space using nuts and dried fruits. The principle remains the same—thoughtful arrangement around intentional emptiness creates magic. The unexpected part? Dessert versions often take less time because people are so mesmerized by the visual that they're happy with elegant simplicity.
- For a wedding shower, try creating interlocking rings in the negative space with a mix of white chocolate, fresh berries, and edible gold leaf
- For a holiday party, a negative space snowflake or Christmas tree feels seasonal without being heavy-handed
- For a children's party, animal shapes or alphabet letters turn the platter into a game they'll want to explore
 Save to Pinterest
 The Negative Space Puzzle taught me that the most memorable meals aren't always about what tastes best—they're about moments that matter. Every time you create one, you're building a memory someone will carry forward and recreate for people they love.
Recipe FAQs
- → How do I create the negative space design?
Sketch your desired shape lightly on parchment paper placed over your serving board to use as a guide for arranging ingredients around it.
- → Can this platter be adapted for dietary restrictions?
Yes, substituting crackers with gluten-free options and adjusting cheeses can accommodate different dietary needs.
- → What types of cheeses work best for this arrangement?
Soft and semi-hard cheeses like Brie, Manchego, and crumbled goat cheese provide contrasting textures and flavors.
- → How should I arrange fruits and nuts for best effect?
Fill gaps between cheese clusters with colorful fruits like grapes, strawberries, kiwi slices, and accent with almonds and olives to add texture and balance.
- → What garnishes enhance the visual appeal?
Fresh mint leaves and edible flowers add vibrant greenery and delicate pops of color to finish the presentation.