 Save to Pinterest
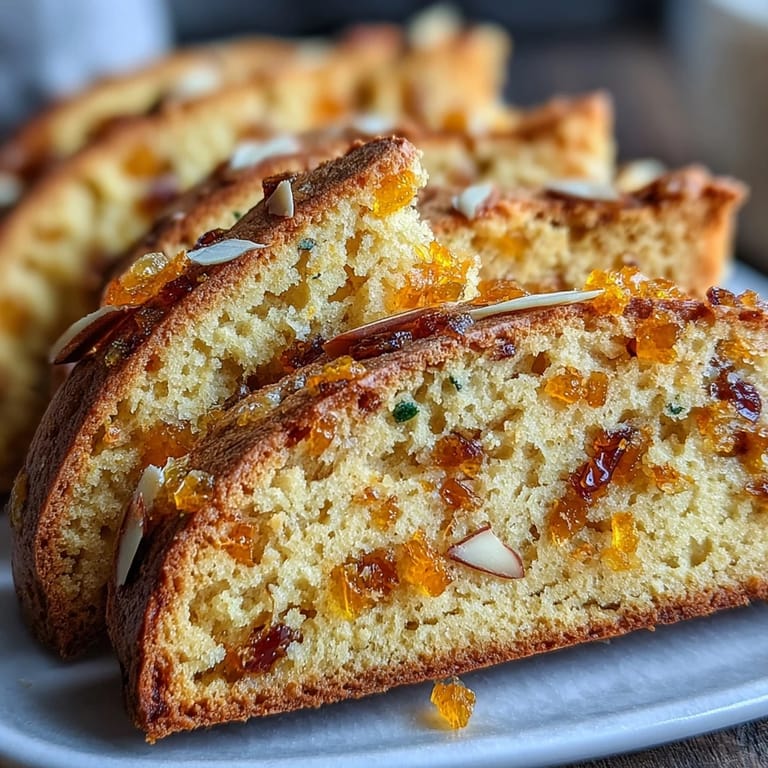
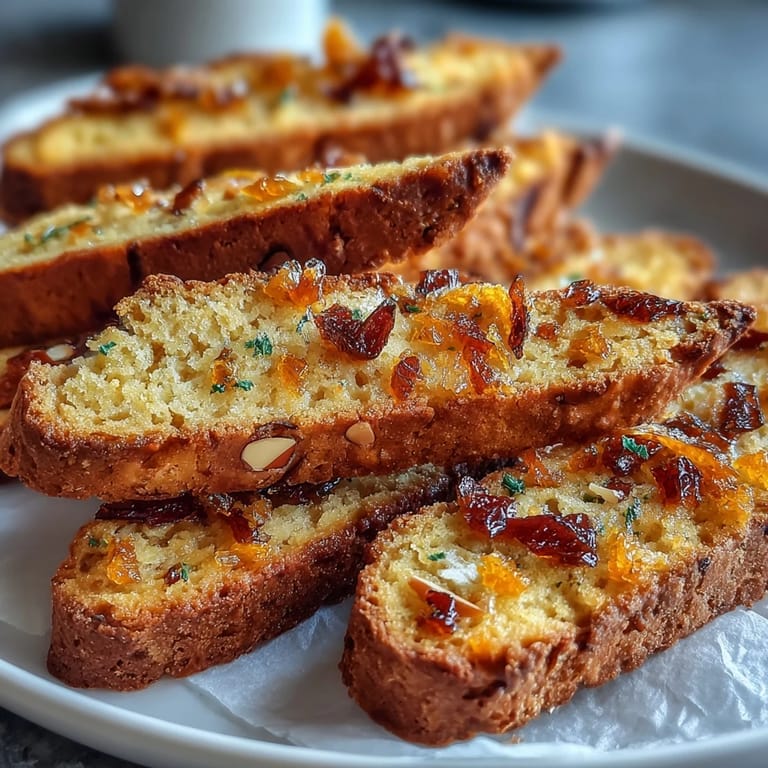
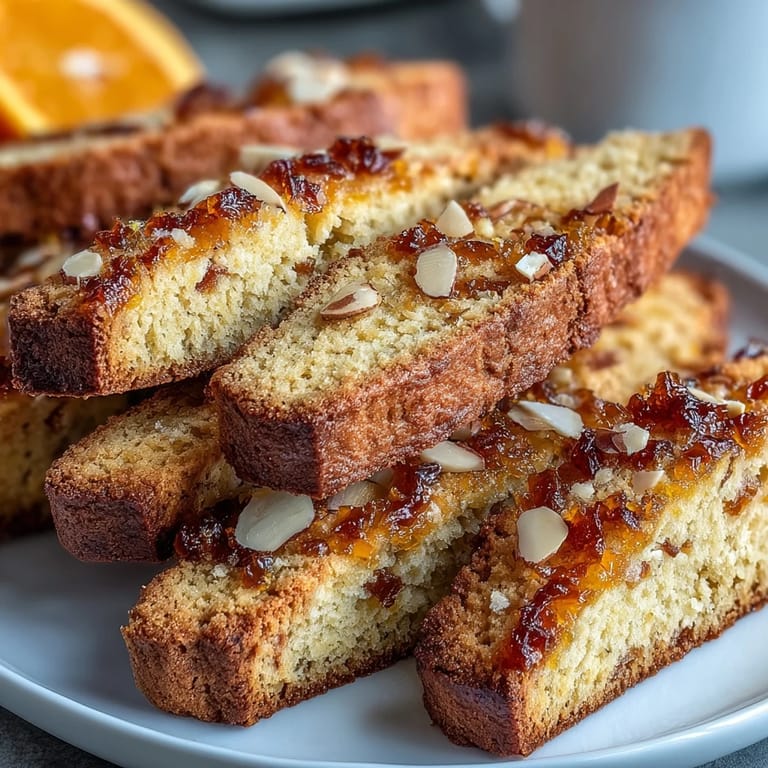
 My cousin Marco handed me a biscotti at his kitchen table in Rome, the afternoon sun streaming through shutters, and I bit into something that tasted like concentrated citrus joy. That moment sparked an obsession with recreating those crisp, twice-baked treasures at home, and somewhere between the second oven and my first successful batch, I realized the secret wasn't just the technique but the respect for simplicity. These candied orange biscotti became my answer to every coffee moment, every quiet evening, every time someone needed reminding that the best things are worth the extra step.
I made these for my book club last winter, and they became the thing people asked about instead of discussing the actual novel. Someone dunked one in her wine mid-sentence and forgot her train of thought, which felt like the highest compliment a cookie could receive.
Ingredients
- All-purpose flour (2 cups): This is your foundation, so measure by weight if you can because it makes the dough texture more predictable and forgiving.
- Baking powder (1 teaspoon): Just enough lift to keep these from being hockey pucks, but not so much that they become cakey.
- Salt (1/4 teaspoon): A tiny whisper that wakes up the orange flavor without making anything taste salty.
- Granulated sugar (3/4 cup): Gets beaten with eggs until pale, which you'll know by how the mixture goes from glossy to almost mousse-like.
- Large eggs (2): Room temperature eggs mix more smoothly, so pull them out an hour before you start.
- Unsalted butter (1/4 cup, melted and cooled): Cooling it prevents the eggs from scrambling when you add it, a mistake I made exactly once.
- Pure vanilla extract (1 teaspoon): Not the imitation kind, because you're already using fresh orange zest and deserve to follow through.
- Orange zest (1 tablespoon finely grated): Microplane it fresh right before mixing so you capture all those bright, essential oils.
- Candied orange peel (2/3 cup, diced): Look for the soft kind without excessive sugar coating, and dice it small so every bite has little bursts of flavor.
- Sliced almonds (1/2 cup, optional): They add crunch and a subtle nuttiness, but these are just as beautiful without them if nuts are a concern.
Tired of Takeout? 🥡
Get 10 meals you can make faster than delivery arrives. Seriously.
One email. No spam. Unsubscribe anytime.
Instructions
- Prepare your workspace:
- Preheat your oven to 350°F and line a baking sheet with parchment paper so nothing sticks when you're pulling these out of the oven. Having everything ready means you won't scramble halfway through mixing.
- Build the dry blend:
- Whisk together your flour, baking powder, and salt in a medium bowl, making sure the baking powder gets distributed evenly. This prevents any pockets of leavening that could create uneven texture.
- Create the wet base:
- In a larger bowl, beat the sugar and eggs together until the mixture goes pale and thick, about two minutes of beating. You'll see it transform from yellow to almost cream-colored, which is your signal that air is being incorporated.
- Add the aromatics:
- Pour in your cooled melted butter, vanilla, and fresh orange zest, stirring gently so the zest stays evenly distributed. The moment the zest hits the wet mixture is when your kitchen smells like you've accomplished something profound.
- Bring it together:
- Gradually add the dry ingredients to the wet mixture, stirring only until combined because overmixing develops gluten and makes these tough. The dough should be thick enough to shape but still slightly sticky.
- Fold in the mix-ins:
- Add your candied orange peel and almonds with a gentle hand, folding them in so they're distributed but not broken into tiny pieces. Stop as soon as you don't see streaks of dry mixture.
- Shape the logs:
- Divide the dough in half and shape each portion into a log about 12 inches long and 2 inches wide on your parchment-lined sheet. Use slightly damp hands if the dough sticks, and flatten the logs just a touch so they bake evenly.
- First bake:
- Slide these into your 350°F oven for 25 minutes until they're lightly golden and feel set when you touch the top gently. They should still have a little give, like good pound cake.
- Cool and prepare for slicing:
- Let the logs cool for about 10 minutes out of the oven, just long enough that you can handle them without burning yourself. This brief cooling sets them up for clean slicing.
- Lower the oven and slice:
- Drop your oven temperature to 300°F, then use a serrated knife to slice the logs diagonally into half-inch-thick pieces. Diagonal cuts look elegant and expose more surface area for crispiness.
- Second bake, first side:
- Lay your sliced biscotti cut side down on the baking sheet and bake at 300°F for 10 minutes until the bottoms are golden and toasted. This is where the magic happens and they start becoming that perfect twice-baked texture.
- Flip and finish:
- Turn each biscotti over and bake for another 10 minutes until both sides are deep golden and they sound crisp when you tap them. Don't rush this step because underbaked biscotti become chewy instead of crunchy.
- Cool completely:
- Transfer them to a wire rack and let them cool all the way down, which takes about 30 minutes but firms up the inside perfectly. Resist dunking them immediately or they'll soften up.
 Save to Pinterest
 There's a specific moment when dunking a biscotti in black coffee that feels like a small ritual, a pause in the day that tastes like intention. These became that for me.
Storage and Keeping
The beautiful thing about biscotti is that they're designed for longevity, which means they're actually better a few days after baking when they've firmed up completely. Keep them in an airtight container away from humidity, and they'll last up to two weeks though they never seem to last that long once people know they're there.
Flavor Variations Worth Trying
Once you understand the basic formula, you can swap the orange zest and candied peel for other flavors that will feel just as natural. I've made versions with lemon and white chocolate, with cardamom and pistachios, even with espresso and dark chocolate chips, and each one feels like you've invented something entirely new.
Pairing and Serving
These are made for dunking, for sharing, for those moments when you need something that's both indulgent and restrained. Pair them with strong coffee in the morning, with sweet wine in the evening, or simply eat them standing at the kitchen counter with your hands dusted in orange-scented crumbs.
- Dark chocolate dipping is optional but absolutely transforms them into something almost decadent.
- Substitute almonds with pistachios, hazelnuts, or omit entirely for nut-free versions without changing the technique.
- These keep in an airtight container for two weeks, making them ideal for gifts or meal prep.
 Save to Pinterest
 These candied orange biscotti taught me that sometimes the best kitchen projects are the ones that require two ovens and a little patience. They're worth every minute.
Recipe FAQs
- → What makes biscotti crisp?
Biscotti are twice-baked, which removes moisture and creates their characteristic crunchy texture.
- → Can I substitute the almonds?
Yes, pistachios or other nuts can replace almonds, or you may omit them for a nut-free version.
- → How should biscotti be stored?
Store in an airtight container to maintain freshness and crispness for up to two weeks.
- → What flavors enhance these biscotti?
Orange zest and candied orange peel provide bright citrus notes; dipping in melted dark chocolate adds richness.
- → Is there a recommended pairing?
These biscotti pair wonderfully with coffee or dessert wine, complementing their sweet and citrusy flavors.