 Save to Pinterest
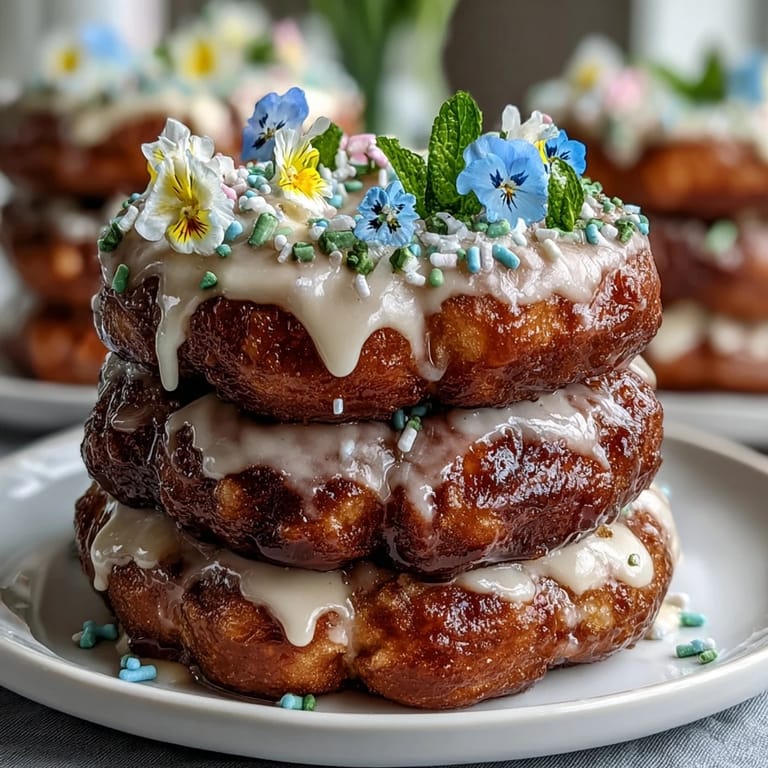
 My friend texted me three weeks before her baby shower: "I need something that looks Instagram-worthy but won't stress me out." That's when the donut tower came to life in my head—no baking required, just stacking, gluing with toothpicks, and letting flowers do the heavy lifting. What started as a practical solution turned into the centerpiece everyone photographed, and honestly, it became the easiest dessert I've ever felt proud of.
I remember standing in my kitchen at 8 a.m. the morning of the shower, foam cone in one hand and a donut in the other, slightly panicking about whether this would actually work. By 9:30, surrounded by scattered edible flowers and sprinkles everywhere, I stepped back and realized I'd created something that felt both celebratory and delicate—like I'd actually done something special, when really I'd just arranged candy on a stick.
Ingredients
- Mini Donuts (36–40): The backbone of everything—use a mix of glazed, chocolate, and flavored varieties so each layer feels unexpected and keeps people reaching for more.
- Powdered Sugar (1 cup): Mix this with just enough milk to create a silky glaze that clings to donuts without sliding off; too thick and it cracks, too thin and it pools.
- Milk or Water (2–3 tbsp): Start with 2 tablespoons, then add slowly until you hit that perfect glossy consistency that coats a donut evenly.
- Vanilla Extract (1/2 tsp, optional): A whisper of vanilla lifts the glaze from plain to something that tastes intentional.
- Food Coloring (optional, pastel preferred): Pastel shades feel softer and more spring-like than bright colors, though pale pink or mint green are my go-to choices.
- Rainbow or Pastel Sprinkles (1/4 cup, optional): These add texture and visual interest while the donuts are still sticky, so they actually stick.
- Edible Flowers (1 cup): Violets, pansies, and nasturtiums are foolproof choices—buy them from specialty grocers or farmers markets, never from florists unless they're explicitly labeled edible and pesticide-free.
- Fresh Mint Leaves (optional): A handful of mint leaves tucked between flowers adds greenery and a subtle color contrast.
- Foam Cone (10–12 inches) or Tiered Stand: The foam cone is easier for a classic tower shape, but a tiered cake stand works beautifully if you prefer a more structured look.
- Toothpicks or Wooden Skewers: These are your adhesive—push them through the donut and into the foam at a slight angle so everything stays secure.
Tired of Takeout? 🥡
Get 10 meals you can make faster than delivery arrives. Seriously.
One email. No spam. Unsubscribe anytime.
Instructions
- Make Your Glaze (if desired):
- Whisk powdered sugar with 2 tablespoons of milk until it's smooth but still pourable, then add vanilla and a drop or two of food coloring if you want pastels. The glaze should flow slowly off a spoon, not drip quickly.
- Glaze and Dress the Donuts:
- Dip each mini donut into the glaze, letting excess drip back into the bowl, then immediately sprinkle with decorations while it's still wet. Lay them on parchment paper and let them set for at least 15 minutes so the glaze firms up and nothing slides around during assembly.
- Prepare Your Base:
- If using a foam cone, place it securely on your serving platter—you can secure it with a dab of frosting or a wooden skewer pushed through the bottom if you're worried it'll shift. If using a tiered stand, make sure it's stable and level before you start loading it with donuts.
- Build Your Tower from Bottom Up:
- Start at the widest part of the cone and push toothpicks through glazed donuts into the foam, arranging them in overlapping circles as you move upward. The donuts should nestle against each other so the tower feels full and cohesive, not sparse.
- Tuck Flowers Between the Layers:
- As you work your way up, slide edible flowers and mint leaves into the gaps between donuts, distributing them evenly around the tower so it looks naturally blooming rather than just decorated. This is where the tower stops looking like a dessert hack and starts looking intentional.
- Fill the Gaps and Step Back:
- Once you've reached the top, scatter any remaining flowers or sprinkles into spaces that feel empty, then take a genuine step back and look at the whole thing. You'll know when it feels complete.
- Chill and Serve:
- Cover loosely with plastic wrap and refrigerate for up to 4 hours if you're assembling ahead, or serve immediately while everything is fresh and the glaze is still glossy. The tower stays stable and beautiful sitting out, but keeps longer in the fridge.
 Save to Pinterest
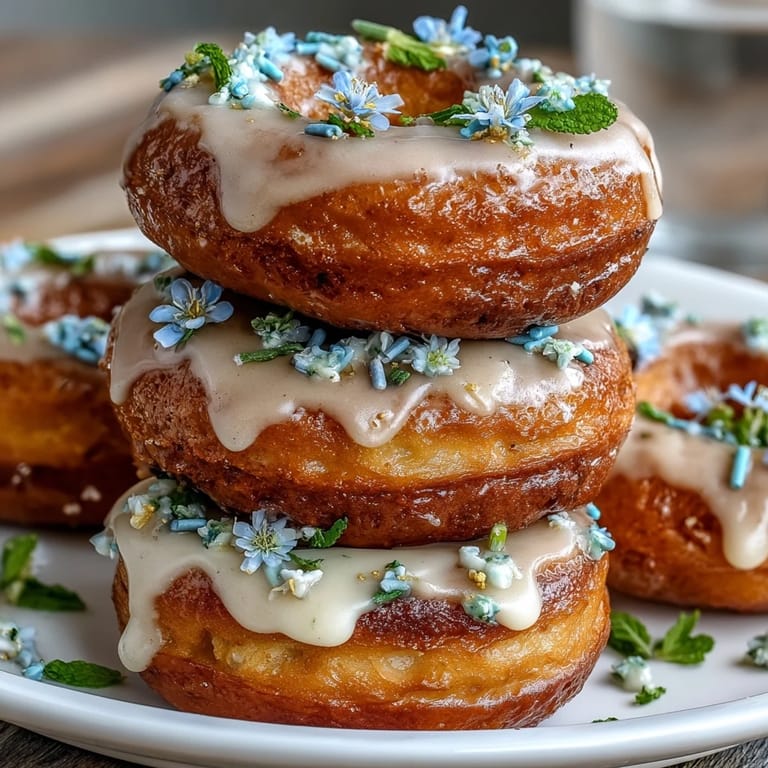
 What struck me most wasn't the final tower—it was watching a grandmother lean in to examine the flowers, then smile because she recognized violets from her own garden. That moment reminded me that food is really about creating something beautiful enough to pause over, and this tower somehow managed to be both effortless and memorable.
Choosing Your Donuts Wisely
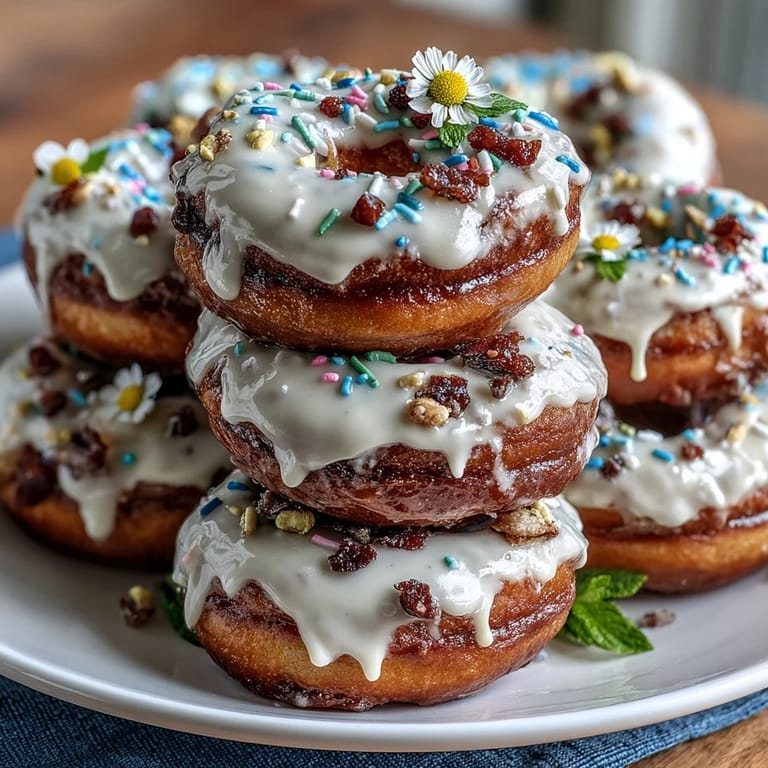
The donut selection is where you set the tone for the entire tower. I learned this the hard way when I grabbed all glazed donuts from one bakery and ended up with a monochromatic tower that looked fine but felt bland. The magic happens when you mix textures and flavors—a few chocolate ones, some vanilla, maybe a Boston cream or two—so each person who grabs a donut from the tower gets a little surprise. Bakeries and donut shops are usually happy to sell you a mixed assortment in small quantities, and some even have seasonal flavors that work perfectly for spring or pastel-themed celebrations.
Flowers That Actually Look Good (and Are Safe to Eat)
Finding edible flowers was trickier than I expected because not every pretty flower is safe to eat, and not every farmer's market vendor knows the difference. I now stick with violets, pansies, nasturtiums, and marigolds because they're reliably available, visually stunning, and you can actually trace them back to a grower who knows they're pesticide-free. Specialty grocery stores, farmers markets, and online specialty food suppliers are your safest bets—florists are out because their flowers are treated with preservatives that would make anyone sick. Once you find a good source, store the flowers in a damp paper towel in the fridge and use them within a day or two so they stay crisp and vibrant.
Timing and Make-Ahead Strategy
The beauty of this tower is that it comes together at the last possible moment, which sounds stressful but is actually liberating. You can glaze and dress the donuts the night before, store them in an airtight container, and then assemble the tower 2–3 hours before your event—everything stays fresh and nothing wilts or gets soggy. I've also learned that having your foam cone or stand positioned on its serving platter ahead of time eliminates one more thing to worry about when you're in assembly mode. One final thought: if you're nervous about the tower toppling, you can discreetly push one sturdy wooden skewer straight through the center of the entire foam cone from bottom to top, which anchors everything without being visible.
- Glaze donuts the night before and keep them in an airtight container at room temperature or lightly chilled.
- Assemble the tower 2–3 hours before serving to keep everything fresh and prevent wilting.
- Position your foam cone on the serving platter beforehand so you're not juggling pieces during final assembly.
 Save to Pinterest
 This tower taught me that the best desserts are the ones that look complicated but feel joyful to make, and that sometimes the simplest ideas create the biggest smiles. Watch how people's faces light up when they see it—that's the real recipe.
Recipe FAQs
- → What type of donuts work best for the tower?
Mini donuts in plain, glazed, or assorted flavors are ideal. Using a mix adds visual appeal and variety in taste.
- → How do I secure the donuts on the tower?
Use toothpicks or wooden skewers to attach the donuts to a foam cone or tiered cake stand, arranging from bottom up for stability.
- → Which flowers are safe to use for decoration?
Choose edible, pesticide-free flowers like violets, pansies, nasturtiums, or marigolds for safe and attractive garnishing.
- → Can I prepare the tower in advance?
Yes, assemble and cover the tower loosely with plastic wrap, then refrigerate up to 4 hours before serving to maintain freshness.
- → Is there a glaze option for added flavor and color?
Mix powdered sugar with milk or water and optional vanilla extract; add food coloring for pastel hues to dip the donuts before decorating.