Save to Pinterest
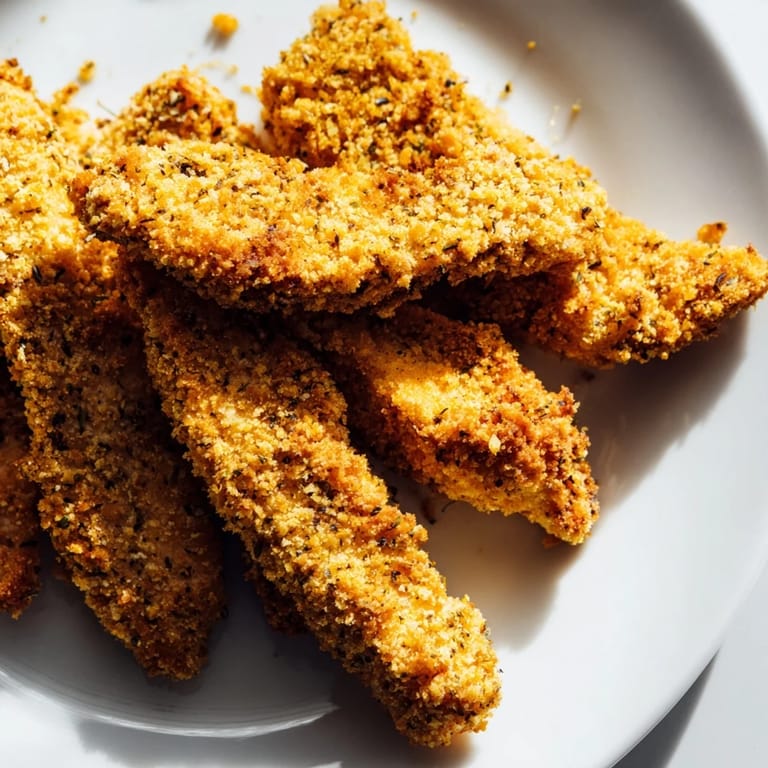
 My seven-year-old nephew took one bite and declared these better than the drive-through kind, which felt like winning an award. I had been trying to nail a baked version that actually tasted fried for months, tweaking the panko ratio and oven temperature until I finally heard that golden crunch. The secret turned out to be a light drizzle of olive oil and a hotter oven than I thought safe. Now these strips show up at every family gathering, and I always make extra because they vanish before the salad even hits the table. It is the kind of recipe that makes you feel like a kitchen hero without breaking a sweat.
I made these on a rainy Tuesday when my friend canceled plans and I needed comfort food fast. The smell of garlic and smoked paprika filled the kitchen while I caught up on a podcast, and by the time the timer rang, I had forgotten why I was even grumpy. We ended up eating them straight off the baking sheet with a bowl of honey mustard between us, laughing about nothing in particular. That night taught me that sometimes the best meals are the unplanned ones. These strips have become my go-to whenever I need something reliable, delicious, and impossibly easy.
Ingredients
- Boneless, skinless chicken breasts or tenders: Pat them really dry with paper towels or the breading will slide right off, a mistake I only made once.
- Salt and ground black pepper: Season generously because the chicken itself needs flavor before the coating even touches it.
- All-purpose flour: This first dredge creates a dry surface that helps the egg mixture cling like glue.
- Large eggs: Whisking them with mayonnaise makes the coating stick better and adds a subtle richness you will notice.
- Mayonnaise or Greek yogurt: Either works, but mayo gives a slight tang and Greek yogurt keeps things lighter without sacrificing texture.
- Panko breadcrumbs: The Japanese-style flakes are bigger and airier than regular breadcrumbs, which is exactly why they crisp up so beautifully.
- Dried Italian herbs: A blend of oregano, thyme, and basil brings that familiar cozy flavor without needing a spice rack overhaul.
- Garlic powder: Fresh garlic burns in the oven, but the powdered kind toasts perfectly and smells incredible.
- Smoked paprika: This adds a gentle smokiness that tricks your brain into thinking these came off a grill.
- Cayenne pepper: Optional, but a tiny pinch wakes everything up without making it actually spicy.
- Olive oil: A light drizzle or spray before baking is what transforms panko from pale to golden and crackling.
Tired of Takeout? 🥡
Get 10 meals you can make faster than delivery arrives. Seriously.
One email. No spam. Unsubscribe anytime.
Instructions
- Preheat and Prep:
- Set your oven to 220°C (425°F) and line a baking sheet with parchment paper, or better yet, use a wire rack so air circulates underneath for maximum crispiness. If you skip this step, the bottoms can turn a little soggy.
- Cut and Season the Chicken:
- Pat the chicken completely dry and slice it into even strips about 2 cm wide so they cook at the same rate. Season both sides with salt and pepper, pressing the spices in gently with your fingers.
- Set Up Your Breading Station:
- Arrange three shallow bowls in a row: flour in the first, whisked eggs and mayonnaise in the second, and panko mixed with all the herbs and spices in the third. This assembly line makes the process fast and way less messy.
- Coat Each Strip:
- Dredge a chicken strip in flour and shake off the excess, then dip it in the egg mixture, letting any extra drip off. Press it firmly into the panko mixture, turning to coat every side, and set it on the prepared baking sheet.
- Add the Magic Oil:
- Once all the strips are arranged in a single layer, drizzle or spray them lightly with olive oil. This step is non-negotiable if you want that deep golden color and audible crunch.
- Bake and Flip:
- Slide the pan into the oven and bake for 18 to 22 minutes, flipping the strips halfway through so both sides get evenly crispy. They are done when the coating is golden brown and the internal temperature hits 74°C (165°F).
- Rest Before Serving:
- Let the strips cool on the pan for 2 to 3 minutes so the coating sets and stays attached when you bite in. Skipping this makes them fall apart, and nobody wants that heartbreak.
 Save to Pinterest
 The first time I served these at a casual dinner party, my friend who swore she only liked fried chicken asked for the recipe before dessert even arrived. Watching everyone pile their plates high and come back for seconds made me realize this dish had officially graduated from weeknight experiment to crowd favorite. Now I keep a bag of panko in the pantry at all times, just in case. It is funny how a simple tray of chicken strips can turn into the thing people remember most about the evening.
Serving Suggestions
These strips are incredible with a tangy honey mustard, creamy ranch, or a spicy sriracha mayo that cuts through the richness. I have also served them alongside roasted sweet potato wedges and a simple green salad for a balanced weeknight dinner that feels a little fancy. For gatherings, I set out a few dipping sauces and let everyone customize their plate. If you are feeding kids, ketchup still reigns supreme, and that is perfectly fine. Pair them with a crisp Sauvignon Blanc or a cold lager if you are in the mood for something refreshing.
Storage and Reheating
Leftovers can be stored in an airtight container in the fridge for up to three days, though they rarely last that long in my house. To reheat, spread them on a baking sheet and warm them in a 200°C (400°F) oven for about 8 minutes until they crisp back up. Microwaving will make them soggy, so resist the temptation even when you are in a hurry. If you want to freeze them, arrange the cooked strips on a tray until solid, then transfer to a freezer bag for up to two months. Reheat straight from frozen at 220°C (425°F) for 15 minutes, flipping once.
Customization Ideas
Once you have nailed the basic recipe, the variations are endless and just as easy. You can swap the Italian herbs for Cajun seasoning if you want a spicy kick, or add a handful of grated Parmesan to the panko for a salty, nutty boost. For a gluten-free version, use gluten-free panko and flour, and the texture stays just as crispy. I have also tossed the cooked strips in buffalo sauce for a game-day snack that disappeared in minutes. The method is forgiving, so feel free to experiment with whatever spices or coatings you have on hand.
- Try adding lemon zest to the panko for a bright, zesty twist that pairs beautifully with a yogurt dipping sauce.
- For extra crunch, mix in a tablespoon of cornmeal with the panko before breading.
- If you are short on time, you can skip cutting the chicken into strips and bake whole tenders for a few extra minutes.
 Save to Pinterest
 These chicken strips have earned a permanent spot in my weekly rotation, and I think they will in yours too. Whether you are feeding picky eaters, impressing guests, or just craving something comforting and crunchy, this recipe delivers every single time.
Recipe FAQs
- → How do I prevent the panko coating from falling off?
Pat the chicken completely dry before breading, as moisture prevents proper adhesion. Use a three-bowl dredging method, ensuring each strip is thoroughly coated at each station. Let coated strips rest on the baking sheet for 5-10 minutes before baking to set the breading.
- → Can I prepare these chicken strips ahead of time?
Yes, you can bread the strips up to 4 hours ahead and refrigerate them on a covered baking sheet. For longer storage, freeze breaded strips for up to 3 months. Bake frozen strips without thawing, adding 5-7 minutes to the cooking time.
- → What's the best way to achieve maximum crispiness?
Use a wire rack placed over your baking sheet to allow air circulation underneath the chicken. Lightly spray or drizzle olive oil over the breaded strips before baking. Flip halfway through cooking and ensure your oven is fully preheated to 425°F.
- → How do I make this gluten-free?
Replace all-purpose flour with a gluten-free flour blend and use certified gluten-free panko breadcrumbs. Check your mayonnaise or Greek yogurt labels for hidden gluten. Everything else in the recipe is naturally gluten-free.
- → What dipping sauces pair well with these strips?
Honey mustard, ranch dressing, and sriracha mayo are classic choices. Try spicy aioli, buffalo sauce, or barbecue sauce for variety. A light Sauvignon Blanc or crisp lager complements the herbed flavors beautifully if serving for entertaining.
- → Can I use chicken thighs instead of breasts?
Yes, boneless, skinless chicken thighs work well and stay incredibly moist. They may require 2-3 additional minutes of cooking time due to slightly thicker meat. Always check internal temperature reaches 165°F for food safety.