 Save to Pinterest
 My sister texted me three weeks before graduation asking if I could make something special for her open house. The request was simple enough, but when she added 'in our school colors with gold,' I knew I had to get creative. That afternoon, I found myself in the kitchen experimenting with cake pops, realizing that what started as a last-minute idea would become the centerpiece of her celebration—tiny, elegant, and unmistakably festive.
Standing at my sister's graduation party, watching guests pick up these little golden treasures, I realized it wasn't just about the dessert—it was about making something by hand that represented her accomplishment. People kept asking where I'd bought them, and I loved that secret smile knowing I'd rolled every single one.
Ingredients
- Vanilla or chocolate cake mix (1 box, about 400 g): The shortcut that doesn't sacrifice taste—homemade cake from scratch is wonderful, but this mix gives you tender crumb without the guesswork, plus all the ingredients listed on the box like eggs, oil, and water.
- Unsalted butter (1/2 cup or 115 g), softened: Start with it at room temperature so it creams smoothly and holds all that powdered sugar without becoming grainy.
- Powdered sugar (1 1/2 cups or 190 g): The foundation of silky frosting—sift it first if you spot any lumps because they'll show up in your final texture.
- Milk (1 tablespoon): Just enough to loosen the frosting to the perfect consistency without making it too thin to grip the cake crumbs.
- Vanilla extract (1 teaspoon): A small amount that lifts the entire frosting flavor and reminds you this is homemade.
- Salt (pinch): This tiny amount amplifies all the other flavors, making the sweetness taste more balanced.
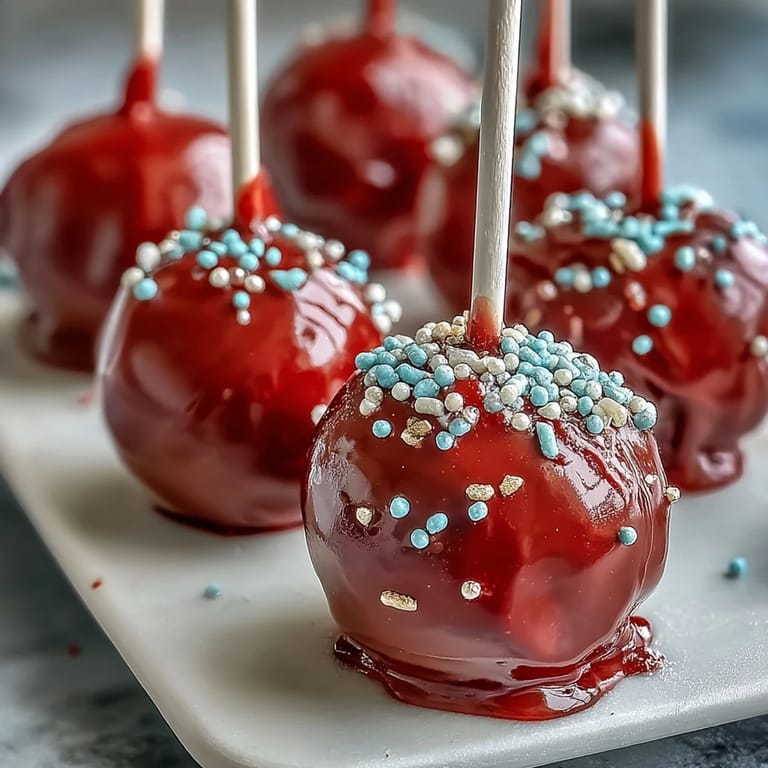
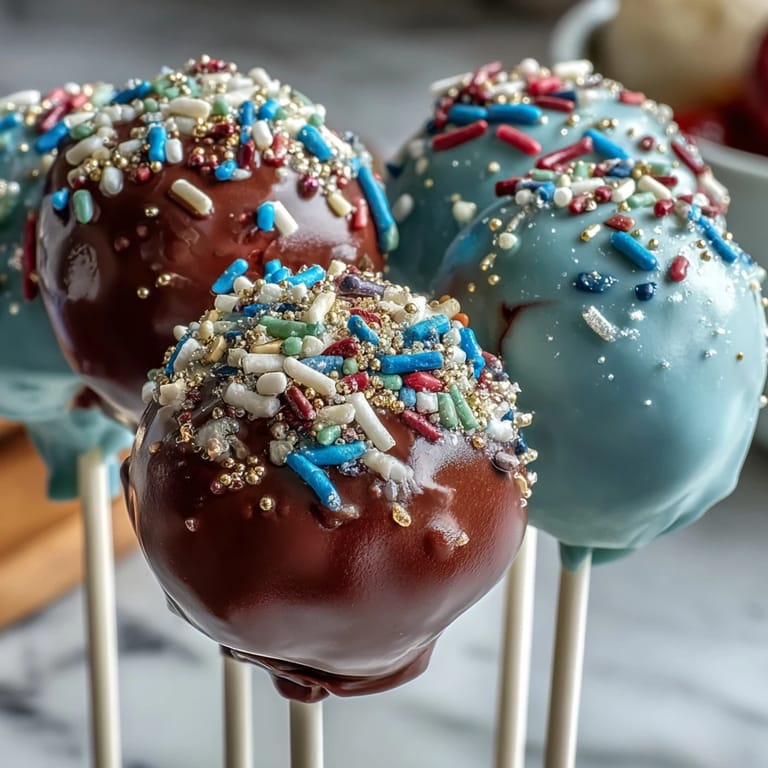
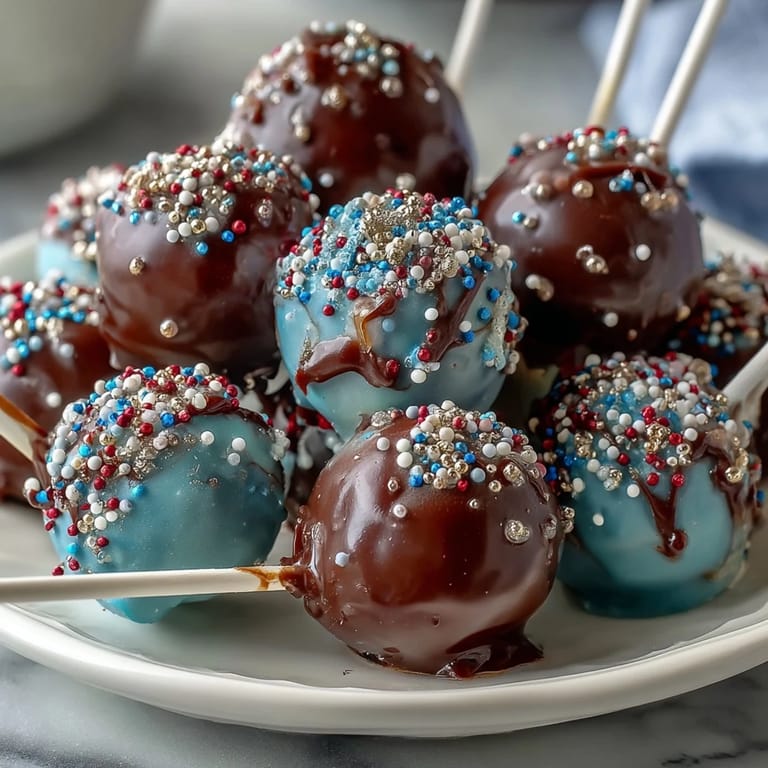
- Candy melts in two school colors (450 g or 16 oz total): The magic ingredient that gives your pops that polished, dipped appearance—choose colors that represent your school and contrast nicely with the gold.
- Vegetable shortening or coconut oil (2 tablespoons, optional): Stir this into melted candy for a thinner coating that flows smoothly and sets with a beautiful shine instead of looking thick and clunky.
- Gold sprinkles or edible gold glitter: The moment these catch the light, your pops transform from pretty to show-stopping.
- Lollipop sticks (24): Standard craft sticks work fine, but food-grade sticks feel more elegant and intentional.
- Styrofoam block: Your drying station—poke the sticks in as the coating sets and everything stays upright and perfect.
Tired of Takeout? 🥡
Get 10 meals you can make faster than delivery arrives. Seriously.
One email. No spam. Unsubscribe anytime.
Instructions
- Bake and Cool Your Cake:
- Follow the box instructions exactly, then let the cake rest on the counter until it's completely cool—warm cake turns into mushy cake balls, and nobody wants that. This is the perfect moment to grab a cup of tea and scroll through your phone guilt-free.
- Whip Up the Frosting:
- Beat the softened butter for about a minute until it's pale and fluffy, then gradually add powdered sugar while mixing so everything incorporates without pockets of dry sugar hiding in there. Finish with the milk, vanilla, and salt, beating until it looks like clouds and tastes like the frosting memories are made of.
- Combine Cake and Frosting:
- Crumble the cooled cake into fine pieces—don't leave big chunks—then add frosting slowly, mixing by hand or with a wooden spoon until it feels like Play-Doh that actually holds together. If it's too wet and sticky, wait a few minutes; if it's too dry, add a touch more frosting.
- Roll Into Balls:
- Use about a tablespoon of mixture for each pop and roll between your palms until smooth—work quickly because the warmth of your hands will help bind everything. Line them on parchment paper and try to keep them roughly the same size so they dip and cook evenly.
- Chill Until Firm:
- Refrigerate for at least an hour or freeze for 30 minutes—this is non-negotiable because soft cake balls will slip right off the sticks and dissolve into the melted candy. Use this time to wash dishes or arrange your decorating station.
- Anchor the Sticks:
- Melt a small amount of candy in the microwave, dip just the tip of each lollipop stick into it, and push it about halfway into each ball—the coating acts like glue and keeps everything stable. Let these set for a minute before moving to the next step.
- Dip in Candy Coating:
- Melt your school color candy melts according to package directions, stirring in shortening if using it to create a smoother, thinner consistency that coats evenly. Working with one pop at a time, dip it into the melted candy, give it a gentle twist, and lift slowly while tapping the stick against the bowl's edge to shake off the excess.
- Add the Gold Flourish:
- Before the coating sets, immediately sprinkle gold sprinkles or glitter all over each pop while it's still tacky—they'll stick beautifully and catch the light like tiny celebrations. Stand each pop upright in your Styrofoam block to harden completely.
- Let Them Set:
- Be patient—the coating needs a few hours or overnight to fully harden, but your restraint pays off when they have that perfect snap and shine. Once they're set, they're ready to wrap, box, or display.
 Save to Pinterest
 When my sister opened the box of these pops at her party, her face lit up in a way that reminded me cake is never really about sugar and flour—it's about showing someone you believe their moment matters. These little golden treasures became the thing people talked about long after the cake was gone.
Troubleshooting Common Cake Pop Disasters
Sticks falling out mid-dip means your cake balls weren't cold enough or the securing dip wasn't thick enough—go back to the fridge for another 15 minutes and use more candy melt on that first coat. If your coating looks dull instead of shiny, the shortening makes all the difference; it smooths out the coating and gives that professional bakery gleam.
Making These Ahead of Time
I made these pops five days before the party and they stayed perfect in an airtight container at room temperature—the cool thing is they actually taste better when they've had time for all the flavors to settle together. If you're making them more than a few days ahead, store them in the refrigerator where they'll keep for up to a week without any loss of texture or taste.
Creative Decorating Ideas Beyond Gold
After that first batch, I started experimenting—using two different school colors on the same pop by dipping halfway into each one, adding pearl sprinkles instead of gold for a softer look, and even tying tiny ribbons around the sticks. The base recipe stays the same, but once you understand how the process works, you can personalize them for any occasion and make them completely your own.
- Try drizzling contrasting candy melt over the first coat for stripes before the gold goes on.
- Edible gold leaf applied while the coating is wet gives an elegant, sophisticated look.
- Small ribbons or twine wrapped around the stick adds a handmade, boutique feeling that guests absolutely love.
 Save to Pinterest
 These cake pops taught me that the best celebrations don't come from bakeries—they come from your kitchen, your hands, and your willingness to try something a little fancy for someone you love. Make them, decorate them with intention, and watch people light up when they realize you made them yourself.
Recipe FAQs
- → How do I ensure cake pops hold together well?
Use the right amount of frosting mixed into crumbled cake—about half to three-quarters of a cup—to bind without making the mixture too wet.
- → Can I customize the colors of the coating?
Yes, use candy melts in preferred hues to match school colors or any event theme. Adding shortening helps achieve a smoother dip.
- → What is the best way to insert sticks securely?
Dip the stick tip in melted candy before inserting into each cake ball to help keep them firmly in place.
- → How long should I chill the cake balls before coating?
Chill for at least one hour in the refrigerator or freeze for 30 minutes to ensure firmness during dipping.
- → What storage tips keep these treats fresh?
Store in an airtight container at room temperature for up to three days or refrigerate for up to a week to maintain freshness.